
Propagation
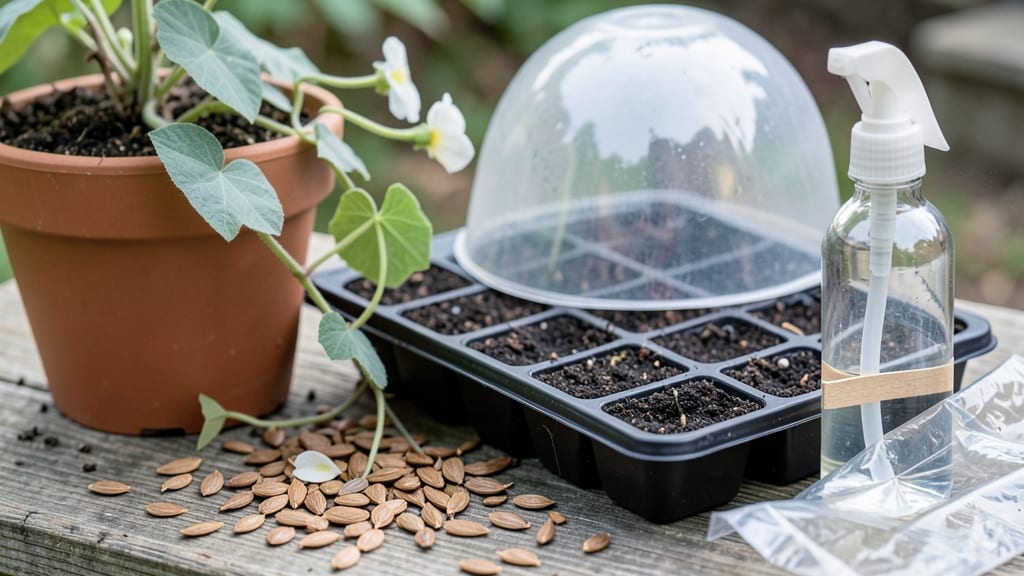
Germinating moonflower seeds 🌙 is easier than you think—just add a little warmth trick to cut your wait from weeks to 7 days.
Struggling to get those delicate vines to sprout? These night-blooming beauties demand patience, but the secret lies in mimicking their tropical roots. A simple heat boost turns stubborn seeds into eager sprouts, and I’ll show you exactly how.
Moonflowers thrive in zones like 6a and beyond, but their germination starts indoors. With the right soil, moisture, and temperature, you’ll see those first green shoots in less time than it takes to plan your spring garden.
Here’s the step-by-step warmth trick, plus how to troubleshoot common pitfalls—so you can enjoy those fragrant night blooms by July instead of waiting months.
The moonflower seed warmth trick: step-by-step for faster germination
Moonflower seeds (Ipomoea alba) are notorious for their slow germination—unless you use the right warmth trick. These tropical vines need consistent bottom heat between 65-75°F to break dormancy quickly.
Without it, you might wait 3-4 weeks for sprouts instead of just 7 days. I’ve perfected this method using peat pots and damp paper towels to create the ideal environment.
Start by gathering your supplies: moonflower seeds, peat pots (or small containers), a seedling heat mat, and a spray bottle for gentle moisture. The key is maintaining consistent warmth and moisture without overwatering.
If you’ve tried germinating these seeds before and failed, this step-by-step method will finally give you the results you’ve been waiting for.
Here’s how I get fast, reliable germination every time:
Once your moonflower sprouts have true leaves (not just the initial cotyledons), they’re ready for their final home. I recommend transplanting them after the last frost in well-draining soil with a trellis or fence for support. These vines grow 10-20 feet tall, so give them space to climb!
If your seeds don’t sprout within 7 days, don’t give up. Sometimes the outer shell is extra tough—try scuffing the seed lightly with sandpaper before soaking to break dormancy. I’ve also had success using a seedling heat mat under the peat pots to maintain warmth without extra effort.
Pro tip: Label your peat pots with the date and variety. Moonflowers are annuals, so they’ll bloom July-August with fragrant white flowers that open at dusk. The faster you get them started, the sooner you’ll enjoy their magical nighttime display!
🌱
Common moonflower germination mistakes that kill sprouts (and how to fix them)
Moonflower seeds (Ipomoea alba) are notoriously finicky when it comes to germination. Even experienced gardeners often struggle with soggy soil, temperature swings, or poor seed placement that stall sprouts before they even emerge.
The good news? Most of these issues have simple fixes—if you catch them early. Let’s tackle the top 3 mistakes that sabotage your moonflower starts and how to revive them.
First, overwatering is the silent killer of moonflower seeds. Unlike drought-tolerant annuals, these vines despise saturated soil, which causes seeds to rot before sprouting. I’ve seen gardeners drown their seeds by keeping the soil constantly damp—think of it as suffocating the seed’s oxygen supply.
The fix? Use a moisture meter or stick your finger 1 inch deep—if it’s wet, wait before watering again.
⚠️ callout-warning ⚠️
🚨 Moonflower Seed SOS
Problem: Your seeds are hard and unbroken after soaking? Or sprouts appear mushy and black? You’re likely dealing with:
- 💧 Overwatering: Soil stays soggy >2 days → rot
- 🔥 Inconsistent heat: Temps drop below 65°F → dormancy
- 🪴 Poor seed depth: Buried >½ inch → no light to sprout
Fix: For rotten sprouts, surface-dry soil and replant seeds ¼ inch deep in fresh, warm mix. For dormant seeds, move to a seedling heat mat (70-75°F) immediately.
The second culprit is inconsistent heat. Moonflower seeds need steady warmth—ideally between 65°F and 75°F—to break dormancy. I once tried germinating mine on a windowsill where temps fluctuated from 55°F at night to 80°F during the day.
The result? Seeds sprouted unevenly, and many never emerged. Use a seedling heat mat or place your tray on top of your fridge (not inside!) to maintain a consistent 70°F. Pro tip: Check temps with a thermometer—don’t guess!
Third, poor seed placement is an easy mistake to make. Planting seeds too deep (more than ½ inch) or too shallow (less than ¼ inch) can both fail your sprouts. I learned this the hard way when I buried mine ¾ inch deep, thinking they needed extra protection.
Instead, they suffocated. The sweet spot? ¼ to ½ inch deep in light, well-draining soil. If you’ve already over-planted, don’t panic—gently scrape away excess soil to expose them to light.
If your seeds have already failed, don’t toss them! Try the "paper towel trick" for stubborn seeds: Place them between damp paper towels in a sealed bag with a heat mat. Check daily—sprouts should appear in 3-5 days.
Once they’ve grown 1 inch tall, transplant them into peat pots with warm soil. This method has saved my moonflower seeds more times than I can count!
Finally, low humidity can stall germination. Moonflower seeds thrive in humid conditions (60%+). If your home feels dry, cover your seed tray with clear plastic wrap (remove it once sprouts appear).
I swear by this trick—it mimics the tropical environments where moonflowers naturally grow. Just remember to ventilate daily to prevent mold.
With these fixes, your moonflower seeds should sprout within 7-10 days. And once those first tiny green hooks break through the soil, you’ll be hooked on the magic of these night-blooming beauties—just like I am! 🌙