
Flowers
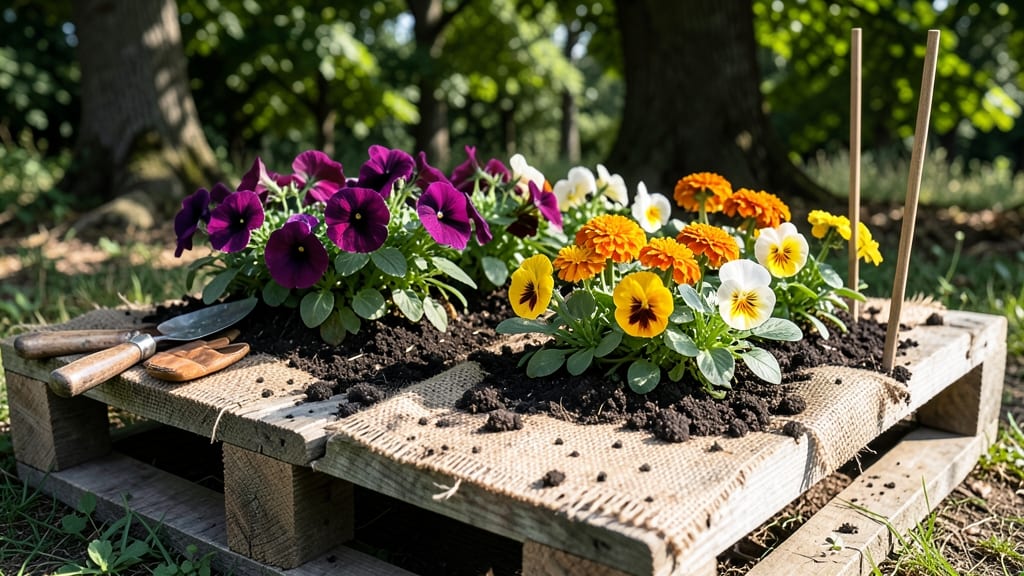
Building raised flower beds with pallets is a creative, budget-friendly way to elevate your garden game while adding height and drainage to your plants 🌱.
Picture this: you’ve got a pile of old wooden pallets sitting in your garage or backyard, and instead of tossing them, you turn them into a stunning, functional garden feature.
Not only does this save money, but it also keeps materials out of landfills while giving your plants the perfect growing environment.
Whether you’re a beginner looking for a simple project or an experienced gardener wanting to experiment with tiered designs, pallet flower beds offer endless customization. From stacking single pallets for a classic look to creating multi-level gardens for vertical growth, the possibilities are limited only by your imagination.
In this guide, you’ll learn how to choose the right pallets, stack them for stability, and design beds that maximize drainage and plant health. Ready to get started? Let’s build your dream garden—one pallet at a time.
How to stack pallets for maximum stability and drainage in raised beds
Stacking pallets for raised flower beds requires careful planning to ensure both structural integrity and optimal drainage. Poorly stacked beds can collapse under plant weight or become waterlogged, harming your root systems.
I’ve learned that the key lies in proper spacing, reinforcement techniques, and strategic placement of drainage layers. Let’s break down how to create a bed that lasts for years while keeping your plants thriving.
Before you start, gather heat-treated pallets (marked with "HT" stamps) to avoid toxic chemicals leaching into your soil. Measure your space—most pallets are 40" x 48", but stacking them vertically or horizontally changes your bed’s dimensions.
For stability, aim for a minimum height of 12" to accommodate drainage layers and root depth for most plants. I recommend starting with a single-tier design for beginners before experimenting with multi-level setups.
Here’s how I stack mine for maximum stability and efficient water flow:
Lay pallets horizontally for wider beds (ideal for flowers or shallow-rooted herbs) or vertically for taller, narrower designs (perfect for tomatoes or trellised plants). Mix orientations for creative shapes like spirals or zigzags.
Place pallets on landscape fabric or cardboard to prevent weeds and moisture from seeping into the ground. Add 2x4 lumber under the corners for extra support, especially if your bed is taller than 18".
Leave ½" gaps between pallets to allow water to drain through. For tighter fits, use a jigsaw to cut slits in the wood. This prevents waterlogging while still maintaining structure.
Line the bottom with gravel or broken pottery (2–3 inches deep) to improve drainage. Top with hardware cloth to keep soil from washing into the gaps. This layer is critical for root health in heavy clay soils.
Use deck screws or galvanized nails to attach pallets at the corners, especially if stacking vertically. For extra stability, add corner braces or metal straps. Test the bed’s stability by gently pressing down on the sides.
Fill the bed with a 50/50 blend of topsoil and compost. Avoid heavy garden soil, which compacts easily. For drought-prone areas, mix in perlite or coconut coir to improve aeration.
One common mistake I see is skipping the drainage layer or using untreated pallets. Always check for HT stamps—untreated wood can leach chemicals that harm plants.
If you’re unsure, sand the pallets thoroughly before use. For added longevity, seal the wood with non-toxic linseed oil to repel moisture and pests.
Pro tip: Place your raised bed on a slight slope (1–2 degrees) to encourage water runoff. This is especially helpful in rainy climates. I’ve also found that adding landscape timbers around the edges elevates the bed further, making it easier to access plants without bending over.
Once your pallet bed is built, monitor the soil moisture closely. Raised beds dry out faster than in-ground gardens, so mulch the surface with straw or wood chips to retain humidity.
With proper stacking, your bed will stay sturdy for 3–5 years—long enough to grow everything from marigolds to zucchini with ease.
For extra creativity, paint the pallets with weather-resistant outdoor paint to match your garden’s aesthetic. Just avoid dark colors, which absorb heat and can stress plants. Now, grab those pallets and let’s get building!
Best pallet materials and designs for long-lasting raised flower beds
When building raised flower beds from pallets, your first decision should be between heat-treated and untreated wood. Heat-treated pallets are chemically free but may have residual stains, while untreated pallets offer a natural look but require weatherproofing like linseed oil or exterior paint.
Always check for the HT stamp to ensure safety for plants.
For ideal dimensions, aim for a 2x4-foot base with 12-inch-high sides—this size balances stability and accessibility. If you need more space, consider double-tier designs or spiral arrangements to maximize vertical growing areas while keeping the footprint small.
| Material Type | Longevity | Safety for Plants | Best For |
|---|---|---|---|
| Heat-Treated Pallets | 3-5 years (with sealant) | Safe (HT stamp verified) | Urban gardens, small spaces |
| Untreated Pallets | 1-2 years (needs treatment) | Safe if sealed (avoid CCA) | Rural gardens, rustic looks |
| Composite Pallets | 5+ years (weather-resistant) | 100% plant-safe | Long-term projects, high moisture |
For creative designs, a single-tier bed works well for small gardens, while double-tier or spiral designs save space in urban areas. Stack pallets vertically with corner braces for stability, and leave a 1-inch gap between layers for drainage.
Line the bottom with landscape fabric to prevent soil from leaking through the slats.
If you’re working with limited space, try a spiral design by stacking pallets in a circular pattern. This creates a vertical garden that’s perfect for climbing plants like clematis or morning glories. Just ensure each tier has drainage holes drilled at the bottom to prevent waterlogging.
For extended durability, reinforce corners with metal brackets or galvanized screws, and apply a non-toxic wood sealant annually. Avoid placing beds in direct sunlight without protection, as untreated wood can warp over time. Instead, position them in partial shade or under a pergola for longevity.
My favorite design combines two pallets side-by-side with a third pallet on top for a two-tier look. This creates a 12-inch-deep lower bed and a 6-inch-deep upper bed, perfect for shallow-rooted flowers like pansies or marigolds on top and deeper-rooted plants like tomatoes below.