
Mower
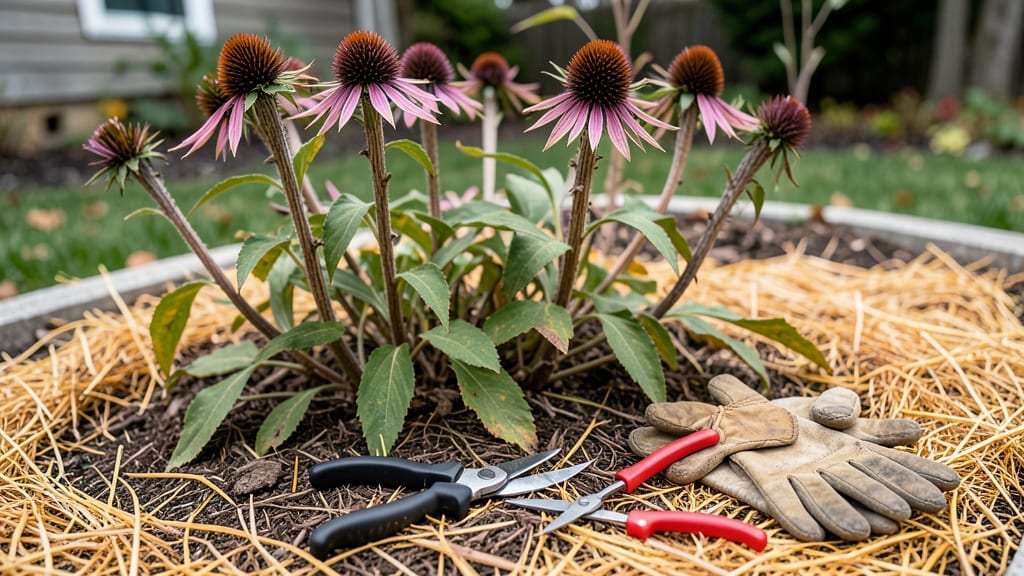
Winterizing coneflowers the right way ensures these hardy perennials return with vibrant blooms next spring 🌼 — and it all starts with the right timing and technique.
Picture this: you’ve spent all summer admiring your purple coneflowers, but by winter, their stems are brittle and the roots are exposed. Without proper care, they’ll struggle to bounce back, leaving you with a sad, sparse garden. The good news? A few simple steps can make all the difference.
From cutting back foliage at the right time to mulching for insulation, each step protects your plants from freezing temperatures and moisture loss. Whether you’re in a cold Zone 6a or a milder climate, these methods keep your coneflowers thriving until spring.
Below, I’ll walk you through the exact process—when to prune, how to mulch, and extra tips for harsh winters—so your garden stays full of color year after year.
When and how to cut back coneflowers before winter
Cutting back coneflowers (Echinacea) before winter is one of the most important steps to ensure strong regrowth next spring. But timing and technique matter—do it too early, and you risk encouraging new growth that won’t survive frost.
Do it too late, and you may leave the plant vulnerable to disease or pests. The key is balancing neatness with plant health, while also considering whether to leave seed heads for pollinators or remove them entirely.
Most gardeners aim to prune coneflowers after the first hard frost but before the ground freezes solid. This usually falls between late October and November in most U.S. zones (6-8), but adjust based on your local first frost date.
If you’re in a milder climate (zones 9-10), you might wait until December or even early January. The goal is to remove dead foliage while leaving the roots intact and protected.
Step-by-Step Guide to Winterizing Coneflowers
Wait until the foliage is brown and crispy from frost, but before the ground freezes. This usually happens 2-3 weeks after the first frost. Avoid pruning in wet or muddy soil, as this can damage roots.
Leave them if you want to support pollinators (like bees and birds) over winter. Remove them if you prefer a cleaner look or if your area has high disease pressure. Cut seed heads 1-2 inches above the base using clean, sharp pruners.
Use clean pruners or shears to trim back the entire plant to 3-6 inches above the ground. Avoid cutting into the crown (the base of the plant), as this can harm next year’s growth. Dispose of the clippings in the trash, not the compost, to prevent disease spread.
Never cut coneflowers down to the ground level, as this removes protective foliage and exposes the crown to cold. A 3-inch stubble is ideal—it provides insulation while keeping the garden tidy.
Apply a 2-3 inch layer of mulch (like straw or shredded leaves) around the base of the plant. This acts as a thermal blanket, protecting roots from freeze-thaw cycles and conserving moisture.
One common mistake is pruning coneflowers too early in the season. If you cut them back in late summer or early fall, you might encourage new growth that won’t harden off before winter.
This weakens the plant and can lead to rot or dieback. Always wait until the foliage is naturally dormant—usually after the first frost.
Another critical decision is whether to leave the seed heads. If you’re in a pollinator-friendly garden, leaving them provides food for birds and insects over winter. However, if your area has high humidity or fungal diseases, removing seed heads can reduce disease risk.
A good compromise? Leave a few seed heads for wildlife but remove the rest to keep your garden neat.
For young coneflowers (first year), be extra gentle. These plants are still establishing their root systems, so avoid heavy pruning. Instead, lightly trim back dead foliage and focus on mulching deeply to protect their delicate roots.
Mature coneflowers (3+ years old) can handle a more aggressive cutback, but always leave that 3-inch stubble.
If you’re in a cold climate (zones 3-5), consider adding an extra layer of protection. After pruning, wrap the base of the plant with burlap or frost cloth to shield it from winter winds.
In mild climates (zones 9-10), pruning can wait until January, but still aim to do it before new growth starts in early spring.
Finally, sterilize your pruners before and after use by wiping them with rubbing alcohol or a 10% bleach solution. This prevents spreading fungal spores or bacterial infections from plant to plant. A little extra care now means healthier coneflowers next season.
With the right timing and technique, your coneflowers will bounce back stronger than ever in spring, ready to reward you with vibrant blooms from early summer through fall. 🌼
Best mulching methods to insulate coneflower roots all winter
Protecting your coneflower roots with the right mulch is the key to surviving harsh winters. A 3-4 inch layer of mulch acts like a cozy blanket, shielding roots from freezing temperatures while keeping moisture levels stable.
But not all mulches are created equal—organic options like straw or shredded leaves break down over time, enriching the soil, while inorganic choices like gravel or landscape fabric offer long-term insulation without decomposition.
Your first step is choosing the right mulch type based on your climate. In cold climates (Zones 3-5), organic mulches like pine straw or wood chips work best because they retain heat as they decompose.
For milder winters (Zones 6-9), a lighter layer of straw or compost suffices, as the risk of rot is lower. Always avoid piling mulch directly against the coneflower stems—leave a 2-inch gap to prevent moisture buildup and disease.
| Mulch Type | Best For | Thickness | Pros | Cons |
|---|---|---|---|---|
| Organic (Straw/Leaves) | Cold climates, soil enrichment | 3-4 inches | Breaks down, adds nutrients | May compact over time |
| Wood Chips | Long-term insulation | 4 inches | Slow decomposition, neat appearance | Can acidify soil over time |
| Gravel | Dry climates, drainage | 2-3 inches | Never rots, improves drainage | No soil enrichment |
| Landscape Fabric | Weed suppression | Under 2 inches of mulch | Blocks weeds, long-lasting | Traps moisture, may suffocate roots |
After selecting your mulch, apply it in two layers for maximum effectiveness. Start with a 1-inch base layer of coarse material like pine needles or wood chips to improve airflow near the roots. Then add a 2-3 inch top layer of finer organic mulch (e.g., shredded leaves) to trap heat.
This two-tier system mimics natural forest floors, where moisture retention and air circulation work together to prevent rot while insulating roots.
One common mistake is over-mulching, which can suffocate plants or attract pests like voles. Stick to the 3-4 inch guideline and avoid mulching until the ground is frost-free but temperatures drop below 50°F at night.
In Zone 5 or colder, consider adding a 6-inch layer of straw over the mulch for extra protection during extreme cold snaps. Always fluff the mulch in spring to restore airflow before new growth emerges.
For wet climates, prioritize mulches with good drainage, like cedar chips or gravel, to prevent soggy roots. In dry regions, organic mulches help retain moisture, reducing the need for frequent watering.
Test your mulch’s effectiveness by probing the soil beneath it—it should feel cool but not frozen during winter. Adjust layers as needed to maintain the right balance of insulation and airflow.
With the right mulching strategy, your coneflowers will thrive through winter and burst into vibrant blooms next spring. Remember: consistency is key—check mulch levels monthly and replenish as it breaks down. Your plants will thank you with healthier roots and bigger blooms come summer! 🌼