
Propagation
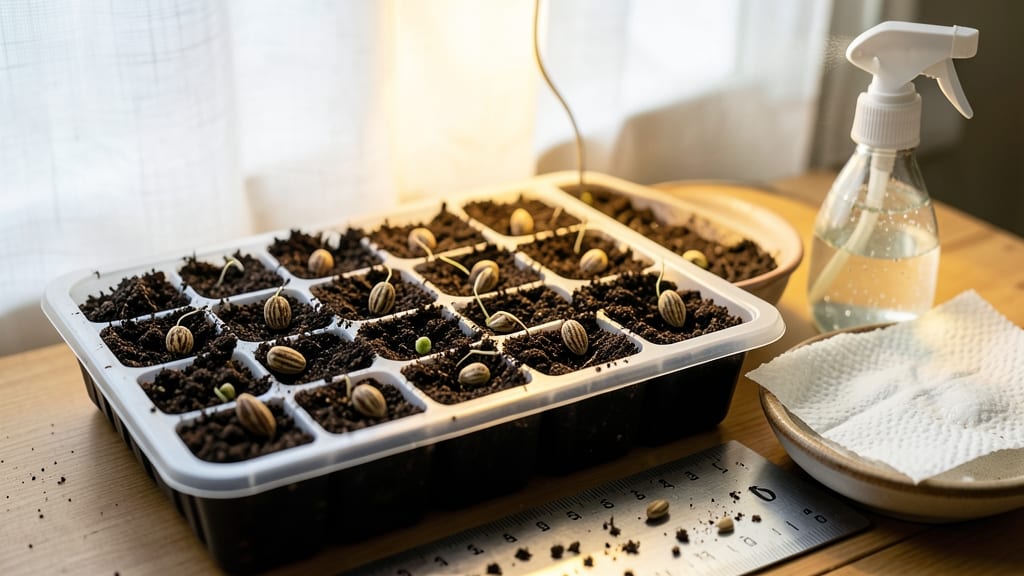
How to soak sunflower seeds for faster germination: step-by-step guide
If you're eager to see those sunflower seedlings pop up faster, pre-soaking your seeds is a game-changer. Sunflower seeds have a hard outer shell that can slow down water absorption, but soaking helps kickstart the germination process by softening the seed coat and activating enzymes.
The key is balancing soaking time and water temperature to avoid overhydration or fungal risks.
Before you begin, gather your sunflower seeds, a clean container, and room-temperature or slightly warm water. Avoid using hot water, as extreme temperatures can damage the embryo inside.
The goal is to create an environment that mimics natural spring rainfall while accelerating the process safely. Let’s dive into the exact steps to maximize your germination success rate.
Step-by-Step Guide to Soaking Sunflower Seeds
- 1 Select fresh seeds: Choose plump, undamaged sunflower seeds with no cracks or soft spots. Old or shriveled seeds may not sprout even after soaking.
- 2 Prepare the soaking water: Use room-temperature water (68-75°F) in a clean bowl. Avoid tap water with high chlorine—let it sit for 24 hours or use filtered water if possible.
- 3 Soak for 6-12 hours: Place seeds in water, ensuring they’re fully submerged. The ideal soak time is 8-10 hours—long enough to soften the seed coat but not so long that they sprout prematurely or develop mold.
- 4 Check for readiness: After soaking, gently press a seed between your fingers. If the shell softens slightly but doesn’t crack, it’s ready. If it feels mushy or splits, reduce soaking time next batch.
- 5 Drain and dry briefly: Remove seeds from water and spread them on a paper towel or clean cloth. Let them air-dry for 10-15 minutes to prevent mold. This step is critical for avoiding rot during planting.
- 6 Plant immediately: Sow soaked seeds 1 inch deep in well-draining soil, spacing them 6 inches apart. Water lightly to settle the soil but avoid oversaturating, as soaked seeds are more vulnerable to fungal diseases.
Once your seeds are planted, maintain consistent moisture in the soil without letting it become soggy. Sunflower seeds germinate best in warm soil (70-85°F), so consider using a seedling heat mat if planting early in the season.
Within 7-14 days, you should see those first green shoots breaking through the soil—proof that your soaking method worked!
If you notice seeds developing black mold or a foul smell during soaking, rinse them thoroughly and reduce the soaking time next attempt. Over-soaking is a common mistake that can kill seeds before they sprout. Always err on the side of shorter soak times, especially in humid climates.
For container gardening, pre-soaking is even more beneficial because seedlings compete for resources in small spaces. Start with 3-4 soaked seeds per pot and thin to the strongest seedling once it reaches 2 inches tall.
This ensures your sunflowers have room to grow into those towering 8-15-foot giants you’re dreaming of.
Pro tip: Label your soaked seeds with the date and soaking time to track which methods yield the fastest germination. Over time, you’ll refine your technique based on your local climate conditions and seed variety. Happy planting—your sunflowers will thank you with vibrant blooms!
🌱
Dry planting sunflower seeds: pros, cons, and best practices for reliable growth
Dry planting sunflower seeds—skipping the soaking step—can feel counterintuitive when you're eager for quick sprouts. But this method offers unique advantages for gardeners who prioritize seed viability and natural growth cycles.
Unlike pre-soaked seeds, dry-planted seeds rely on consistent soil moisture and temperature to trigger germination, which can actually reduce risks of overhydration or fungal issues.
Sunflower seeds have a hard outer shell designed to protect the embryo while waiting for ideal conditions. When planted dry, they mimic natural germination patterns, often producing hardier seedlings better adapted to outdoor stresses.
However, this approach requires precise planting depth and moisture control to compensate for slower initial sprouting—typically 7-14 days compared to 3-7 days for soaked seeds.
Here’s the breakdown of when dry planting shines and where it falls short, plus my battle-tested tips to maximize success.
Dry Planting Sunflower Seeds: Quick Comparison
- Hardier seedlings—natural stress resistance
- Reduced fungal risk—no overhydration from soaking
- Better for bulk planting—no seed prep needed
- Mimics natural growth—ideal for outdoor conditions
- Slower germination—7-14 days vs 3-7 days
- Requires precise moisture—soil must stay consistently damp
- Less control over timing—unpredictable sprouting
- Risk of rotting if soil stays too wet
For dry planting to work, your soil temperature must stay above 60°F (15°C)—sunflowers won’t germinate in cold soil. Test your soil’s moisture by squeezing a handful: it should hold together but not drip water.
Plant seeds 1 inch deep in loose, well-draining soil, spacing them 6 inches apart to prevent overcrowding. A light mulch layer helps retain moisture without suffocating sprouts.
Monitor your seeds closely after planting. If the top inch of soil feels dry, water gently with a fine mist to avoid displacing seeds. Avoid overhead watering once seedlings emerge to prevent fungal diseases like damping off.
My trick? Use a drip irrigation system or water at the soil base to keep conditions stable.
Dry planting sunflower seeds rewards patience with stronger, more resilient plants. While soaked seeds sprout faster, dry-planted sunflowers often outperform their pre-soaked counterparts in drought conditions and poor soil.
For best results, combine dry planting with rich compost and full sun exposure—your sunflowers will thank you with taller stems and bigger blooms by summer.
🌱